Fabric Easter Egg Tutorial & Free Pattern
These plastic free, reusable fabric eggs are so cute your kids will want to play with them year round! You can quickly sew up dozens of these eggs in all sizes using just your fabric scraps! I’ve included a free pattern so that you can make your own fabric eggs!
This is a simple little project, but there are so many variations you can make! Pieced fabric eggs from orphan quilt blocks or scraps, eggs made from up-cycled fabric, eggs decorated with ribbon and ric-rac- the sky’s the limit!

Step 1-
Select your fabrics. To add stability or reduce transparency you may want to layer the front with another fabric or back with fleece. It’s not necessary, but adds a nice touch.

Step 2-
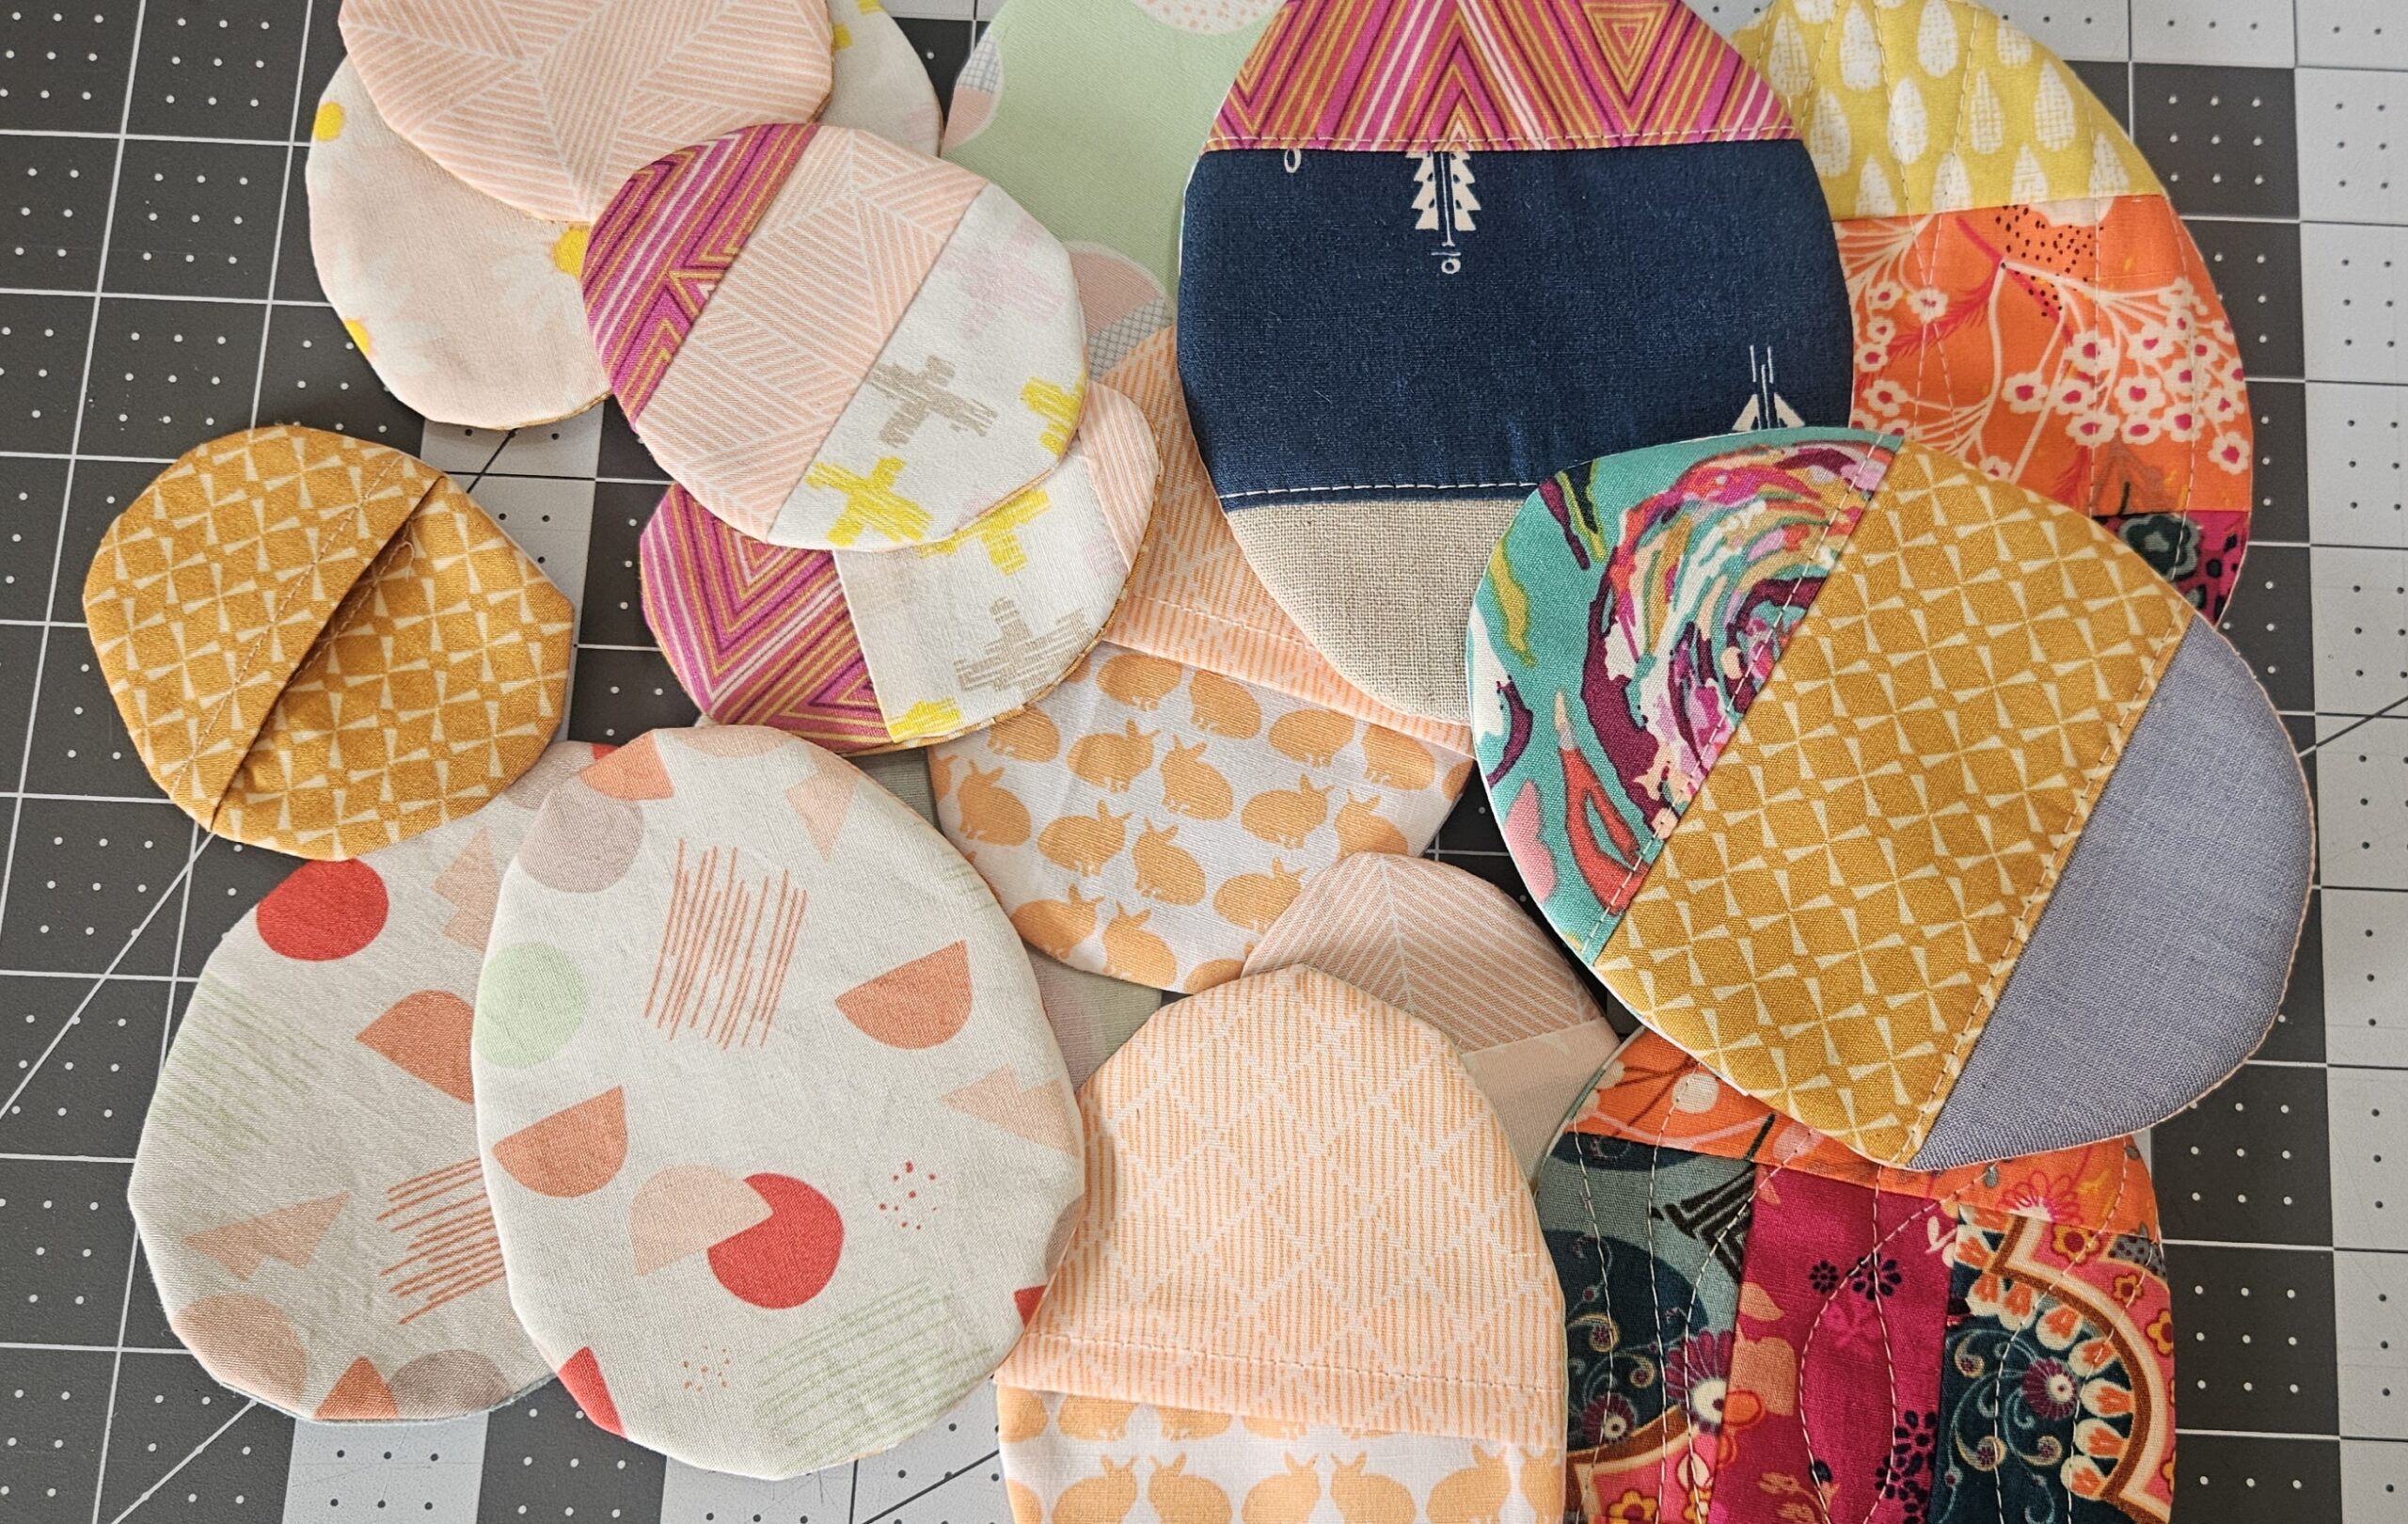
Cut out your pieces from your chosen sizes. I’ve included 3 different sizes in the pattern. To save time you can cut strips the size of the back pieces and cut out individual pieces from the strip after finishing the edge with a narrow hem.

Step 3–
Sew a narrow hem on the back pieces by folding over the opening edge 1/4″ twice and sewing. To cut the back pieces from a strip that you’ve sewn a 1/4″ narrow hem on fold over the pattern pieces to the solid line and line up to the sewn edge. Trace and cut out 1 back top and 1 back bottom for each egg front.
Step 4-
Place your Front Piece down, facing right side up. (If you’re using a backing, place that underneath the front piece.) Now, place the Top Back Piece down on top right sides together, and then the Bottom Back Piece down, right sides together. Line up edges, they should overlap in the center, and pin or clip together.

Step 5-
Sew the egg all around at 1/4″ seam allowance. If curves are a little challenging for you cut the pattern pieces with a 1/2″ seam allowance and trim down to 1/4″ after sewing.
Finish the edges with a zig-zag stitch, a serger/ overlock stitch, or by using pinking shears. Pinking shears will have the least bulk and will make the smoothest curves of all options. I could not find my pinking shears the day I sewed these so I did a zig-zag stitch around. Don’t skip finishing the edges or else they might fall apart when washed.

Step 6-
Flip the eggs right side out. Poke the edges out smoothly. I used a popsicle stick and it worked like a charm. Lightly press the eggs.
Ta-Da! Fill with goodies or leave out the night before Easter for the bunny to work it’s magic and start a new Easter tradition!